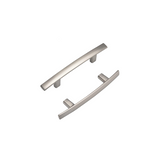
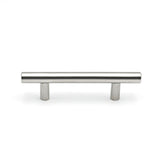
Step #1: Examine your cabinets and pick the right hardware
When choosing your new hardware, make sure you examine your cabinet doors and drawer fronts. Start by measuring the width of the flat areas on your doors and drawer fronts.
Some kitchen layouts have some very small doors or drawer fronts that wide handles may not fit on. You need to pick your hardware—that is, the actual knob or pull handle—based on the width of the smallest door or drawer you have.
Also, pay attention to how flat the area is where the base of the knob or pull will sit. Some hardware have really wide bases that—depending on the detailing on your calendar—may not fit.
Step #2: Make sure you have the right screws for the job
Finally, remember to check if the hardware you are going to buy has longer screws for the drawers. Most hardware only comes with smaller 1-inch screws for the doors. So, measure the thickness of the cabinet doors and drawer fronts—including the drawer box—to determine you are getting the right screws.
If the screws you have are too long or too short, you can find suitable replacements at any home improvement store.
Step #3: Figure out where you need to drill
The are two ways to figure out where you need to drill holes for installing the hardware:
Measuring every door and drawer. As you might expect, this can take a while, especially if you live by a “measure twice, cut once” mentality (which you should, especially when you’re drilling your own cabinet hardware for the first time!)
Using a jig from the hardware store as a template. This is much faster and easier, but you’ll need to decide which holes in the template to use for the specific hardware you’ve selected. When in doubt, ask the folks at the local hardware store.
If you decide to measure manually:
Measure the width of the side rail of the door—including the detail—and divide that in half to find the center. If you are unsure about your math, measure the opposite way after you mark it to double-check your accuracy.
You can do the same vertically. Of course, pull handles and knobs on the pull-out drawers should be in the exact center of the drawer. But, for the rest of your cabinets, you’ll have to decide the vertical placement of the hardware. The standard is 3″ up the upper doors and 3″ down on the base doors.
Step #4: Drilling the cabinet fronts
Make sure that you open the door during the drilling process to ensure that you don’t end up drilling the wrong side of the door and so you don’t drill into the frame of the cabinet behind the door.
Once you drill the first holes, then you can find out which holes in the template line up the best. You may have to drill your own hole in the template. For the rest of the doors, mark the holes on the door with a pencil using the template.
Do not drill through the template. After a couple holes the hole will get bigger in the template and will no longer be accurate.
Step #5: Drilling the cabinet drawers
Drilling the cabinet drawers is a little more difficult than the doors, but it is doable for you, as a homeowner committed to drilling your own cabinet hardware.
First, measure the height of the drawer front and divide it in half. Put a pencil mark on the drawer front where the middle will be. Be sure that you do not press too hard with the pencil—you don’t want to put an indentation in the wood. This is an easy mistake to make when you’re drilling your own cabinet hardware for the first time.
After you find the vertical center, measure the width of the drawer front and divide that in half to mark the center of the front horizontally. If you are drilling a single hole for knobs, this is where you will drill.
If you are drill two holes for a pull handle, you need to measure equal distances left and right to ensure the pull will be center on the drawer front. You may also choose to put two pulls on wider drawers if desired. Usually when this is done, you try to measure equal distances from both sides. Once you drill your first holes, then you can line up the template.
Additional tips for drilling your own cabinet hardware
Always use a new, sharp drill bit and do not push hard when drilling your doors and drawer fronts. If you use a dull drill bit, or push while you drill, you’ll blow the back of the wood out and make it look unsightly behind the door or drawer.
Make sure to make any cabinet adjustments before drilling your drawers. If you don’t wait, the hardware will appear off level and will be harder to adjust later.
Always use a drill bit slightly larger than the screw you are using. If the screw does not go in freely, it will strip out and break off inside the drawer or door. A 3/16″ drill bit is recommended for the standard 8/32″ screws.
If you are uncertain about anything, ask someone. Cabinet doors and drawers can be expensive to replace, so if you’re drilling your own cabinet hardware, you’ll want to take the time to do things right.
Recent Blogs
-
From the Sink to Cabinet Hardware
March 16, 2023
-
How to Mix Cabinet Hardware--Kn...
August 18, 2022
-
Cabinet Hardware You'll Love in...
November 16, 2021
-
How to use the cabinet handle?
November 16, 2021
 English
 Arabic


